After about four hours of work on the
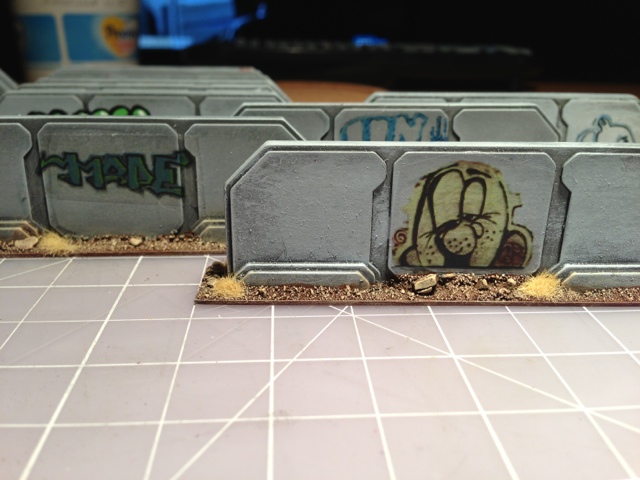
proxie models 28mm scale street barricades, I have managed to complete 18 of these beauties for use in both 30mm and 15mm scale games.

I had cut 2mm styrene sheets into 0.5" x 2.5" strips. These styrene strips form the bases for the blast curtains (I consider them the blast curtains that you might find at the periphery of a star port launch/landing field). These devices would be common in order to avoid small particles from damaging equipment or other vehicles from thrust born vehicles.
In hindsight I would have liked to have cut the corners of the strips at 45 degree angles so that it would be easier to match the pieces up at 90 degree angles.
Each of the barricades were then welded to the styrene strips using tenax-7 plastic welder which works fantastically well on styrene and PVC type plastics. Once the barricades were welded, I then proceeded to add super glue to the strips and spread it around using a kabob skewer point and then allowed the sand mix, that I use for basing, to flow over the glued surfaces.

A liberal coat of testers flat euro-1 Grey was then sprayed into the barricades en-mass. A light dry brushing of Vallejo game color ghost grey was applied with a large soft house painting brush. Next came a black ink wash to collect in the crevices and nooks of the model followed by another ghost grey dry brushing.
The sand mix base then had a wash of Vallejo skin wash ink then a Vallejo model color dry brushing of Iraqi sand.

My daughters had wanted to try their hands at doing some 'tagging' as
space jacker had done with his excellent versions of these models.

Barricades after initial dry brushing with Ghost Grey. The tags were simple to perform on these models since they already had a lighter background color, the letter outlines were simply painted on in black then the interior spaces were then painted in with standard color combinations. A final white highlight was added to a few in order to give them a bit of a gleam. Seeing as that these were the first attempt to paint such things, my kids had done a fantastic job!
Tagged blast walls. Models by GZG, Khurisan, 15mm.co.uk. The Weyland-Yutani logo for good effect.
Drybrushed wall example
Traveller imperial sun burst
My daughter wanted to make one with a portion of our dog's name.
Two nobles behind the cover of the baffling blast walls. 'Dumb' had a deliberate misspelling.
Magistrate and his droid companion
Shuttle blast wall examples.
 This is one of the two 'Vader' figures I have from the Martian metals line. I have several other versions of Vader that will be posted on this blog and better photos when I have proper lighting for shooting this model properly.


 I had cut 2mm styrene sheets into 0.5" x 2.5" strips. These styrene strips form the bases for the blast curtains (I consider them the blast curtains that you might find at the periphery of a star port launch/landing field). These devices would be common in order to avoid small particles from damaging equipment or other vehicles from thrust born vehicles.
 A liberal coat of testers flat euro-1 Grey was then sprayed into the barricades en-mass. A light dry brushing of Vallejo game color ghost grey was applied with a large soft house painting brush. Next came a black ink wash to collect in the crevices and nooks of the model followed by another ghost grey dry brushing.
 My daughters had wanted to try their hands at doing some 'tagging' as space jacker had done with his excellent versions of these models.
 Barricades after initial dry brushing with Ghost Grey. The tags were simple to perform on these models since they already had a lighter background color, the letter outlines were simply painted on in black then the interior spaces were then painted in with standard color combinations. A final white highlight was added to a few in order to give them a bit of a gleam. Seeing as that these were the first attempt to paint such things, my kids had done a fantastic job!




 You can see another fantastic rendition of this star ship in the blog banner above as well as the conceptualized art work for the T5 rulebook. This is a wonderful ship design that only suffers from one flaw on the deck plans - that is both an overhead/dorsal exterior hatch. I would assume that ships of this size and shape would need a way to dock/connect with an umbilicus to other ships easily and this plan is missing that very thing.


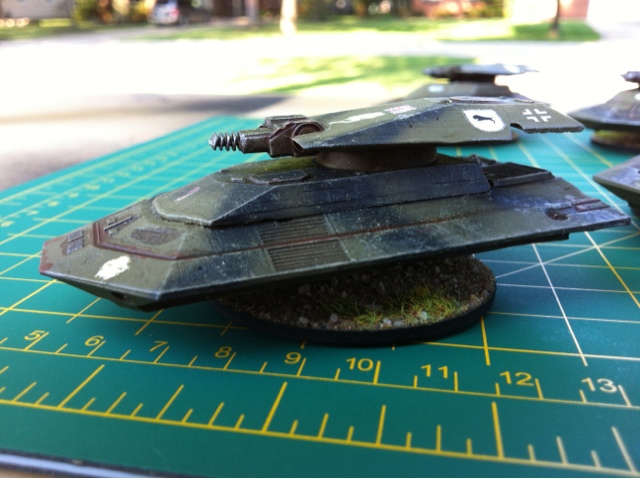
 I
had fallen in love with this tank the first time that I had seen the
box cover artwork that was produced by Martian Metals "back in the
day". All of the larger models were sold in this box and identified
with a typed label.
I
had fallen in love with this tank the first time that I had seen the
box cover artwork that was produced by Martian Metals "back in the
day". All of the larger models were sold in this box and identified
with a typed label.